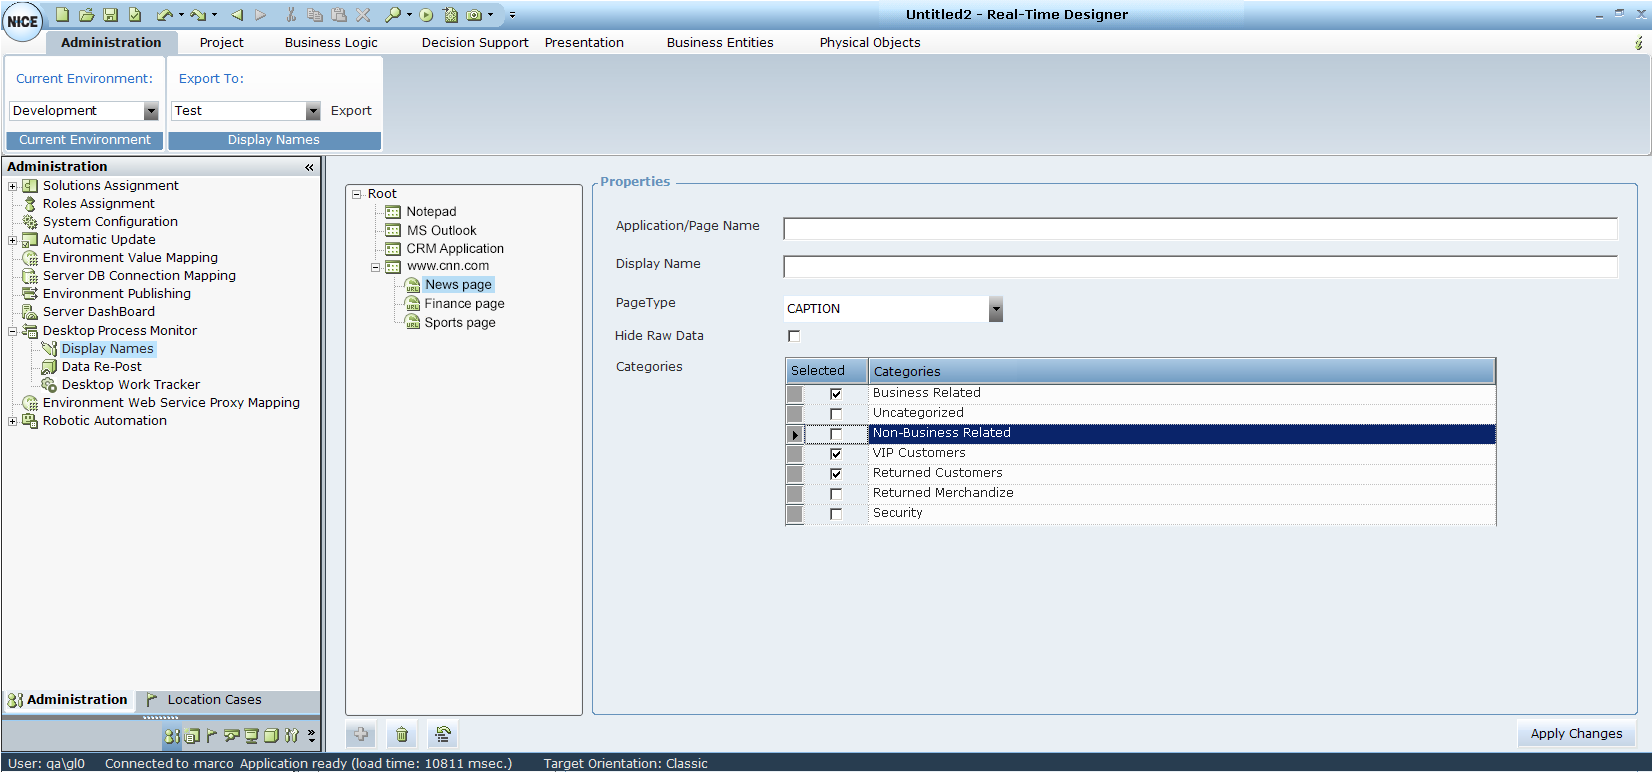
Adding a Page to an Application and Defining Its Display Name
You can add a Page to an existing Application, and then define a Page name that is more intuitive and easily recognizable in generated reports.
You can also change an existing Page name.
To add a page to an application and define its display name:
| 1. | In the Root folder tree select an Application, right-click, and select Add. |
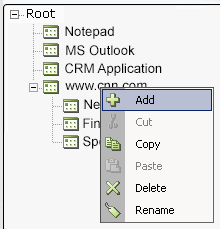
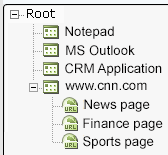
A Page is added under the selected Application
You can also select an application in the tree and then click  at the bottom of the window.
The following is displayed in the Properties area in the right pane of the window:
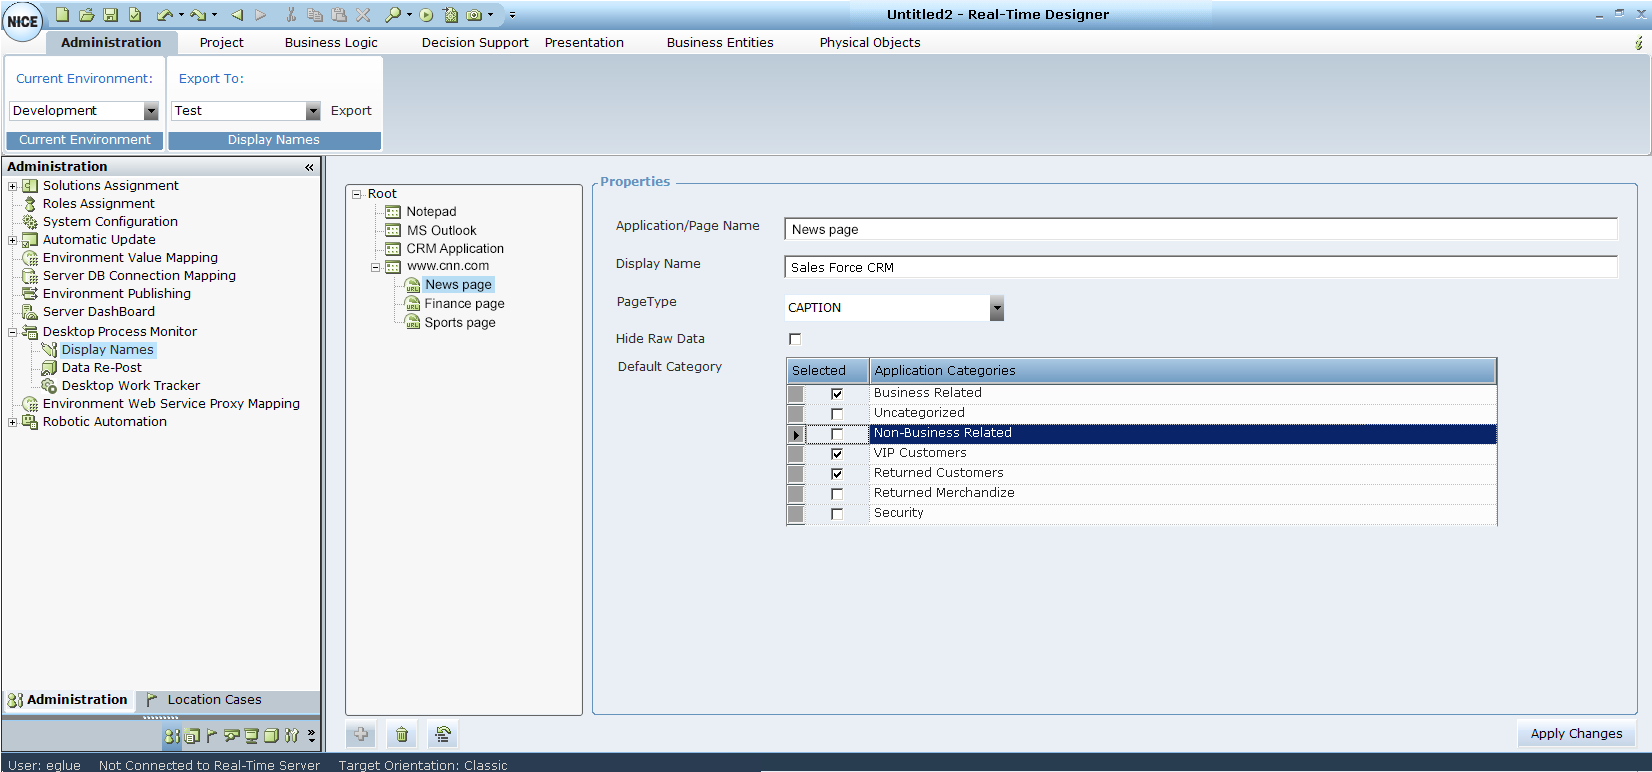
| 2. | In the Application/Page Name field, enter a name for the page. |
You can use asterisks as wildcards in this field. For example, if you specify *Corporate* in this field, the display name for all pages for that application that contain the string Corporate are changed accordingly, based on the display name you specify in Step 3 below.
When using wildcards in this manner, the entire page name or caption is affected, and not only the part that matches the string within the wildcard characters.
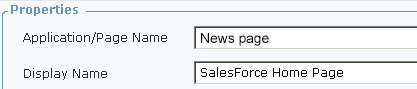
| 3. | In the Display Name field, specify a display name. Display names can have a maximum of 300 characters. |
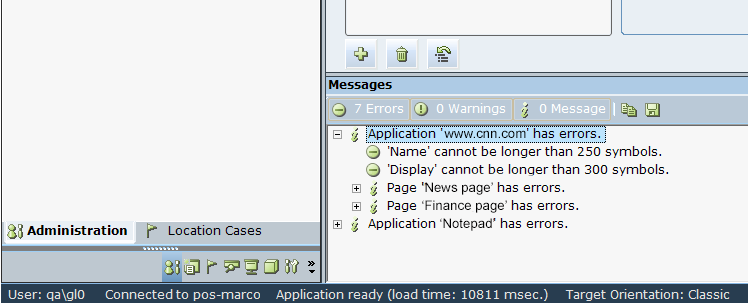
Display names longer than 300 characters are marked with a red line in the tree.
| 4. | In the Page Typedropdown list, select one of the following options: |
CAPTION: Indicates whether to use the page name, as specified in the title bar of the browser window, to identify the page.
URL: Indicates whether to use the page name, as specified by the page’s URL, to identify the page.
| 5. | From the Category list, select a category from the list of available categories. Selecting a category will enable the user to filters in relevant reports, per the selected category. |
| 6. | Click the Apply Changes button at the bottom of the window to save your settings. |
| 7. | If there are any errors, they are displayed in the Messages pane at the bottom of the window. |